How to Make Your Own Planner Stickers
- Lucy

- Aug 1, 2017
- 7 min read
I just purchased an Erin Condren Timeless Planner and am completely obsessed with it. I have always been sort of OCD, especially when it comes to my schedule, so I thought I would switch from the Lilly Pulitzer agenda to the Timeless planner. The Timeless Planner offers me so much more as an organizer. You can design the pages to have different layouts. I chose the scheduled pages this year so I can block out times for classes and work and visualize how much time I have for blogging and homework and studying. I felt like the Lilly Pulitzer agenda was a little all over the place-- it was almost "too sloppy" for me. Simply put, there wasn't enough structure on the pages -- there was no method to my organizational madness.

Typically, with an Erin Condren Timeless Planner, people use stickers. They are custom made and measured stickers that help you plan your day. You can purchase these on Etsy in weekly packs for around $5 including shipping. Friends, I'm a numbers person so I multiplied $5 times 52 weeks and if I purchased a sticker pack for each week of the year, I would spend over $260 in stickers alone. Not happening. I knew that there must be a way to create my own on the computer or find a template the I could copy. So, I did a little digging on Pinterest and I found a little info. There were some free downloads, but nothing really matched my personality. Most of the ones offered were to help moms plan meals and manage kids, nothing was geared towards the everyday student. I spent about 3 hours on the computer measuring the heights and widths of everything and messing around with what template I wanted, but I think I found a happy medium of fun prints and patterns and organization help.
I wanted a layout were I could both write and stick stickers on the agenda. I have watched many a "plan with me" video and sometimes people go way overboard with the stickers. It's kind of overkill -- they forget what the agenda is really needed for. I need some space to make colorful and happy but also be able to block of chunks of the day for work and class. I use pages on MacBook to help me create my sticker sheet but, I've messed around with Word and that works just as well. The reason I love pages is because if I want to layer boxes and text, the program will tell me if I'm centered.
There are a few supplies that you will need for this project -- first off a planner. Obviously, you need something to be working with. Next, you need a ruler. Something that can get you an exact measurement of the box or line in your planner. I used the Erin Condren one that comes with my planner but I wish I had one with a more tick marks for better accuracy. You will need matte white sticker paper as well. You can purchase this from Avery but if you want to save a few bucks, Staples brand makes a pack of 30 sheets for $17. Finally, you will need some scissors to cut out your final product.
When beginning this project, you need to know the measurements of your agenda. I measured out the monthly calendar boxes, along with a few different measurements on the hourly planner page. You need to know the width and the height for all of these. I measured the quote box on the page, the side bar height and width, the height of a single sidebar line, a 75 minute long box for class, a 50 minute long box for class, a 5 hour long box for shifts at work, a 90 minute long box for blogging, several boxes that fill one line of the hourly schedule for laundry, TV, shopping, and packages, and then some empty bullet points for checklists. I also added a few cute images for stickers to fill up blank space. You can measure anything you want for however long you need but those are some examples of boxes I wanted to make. Below is a picture of the hourly planner measurements just to show what I mean.

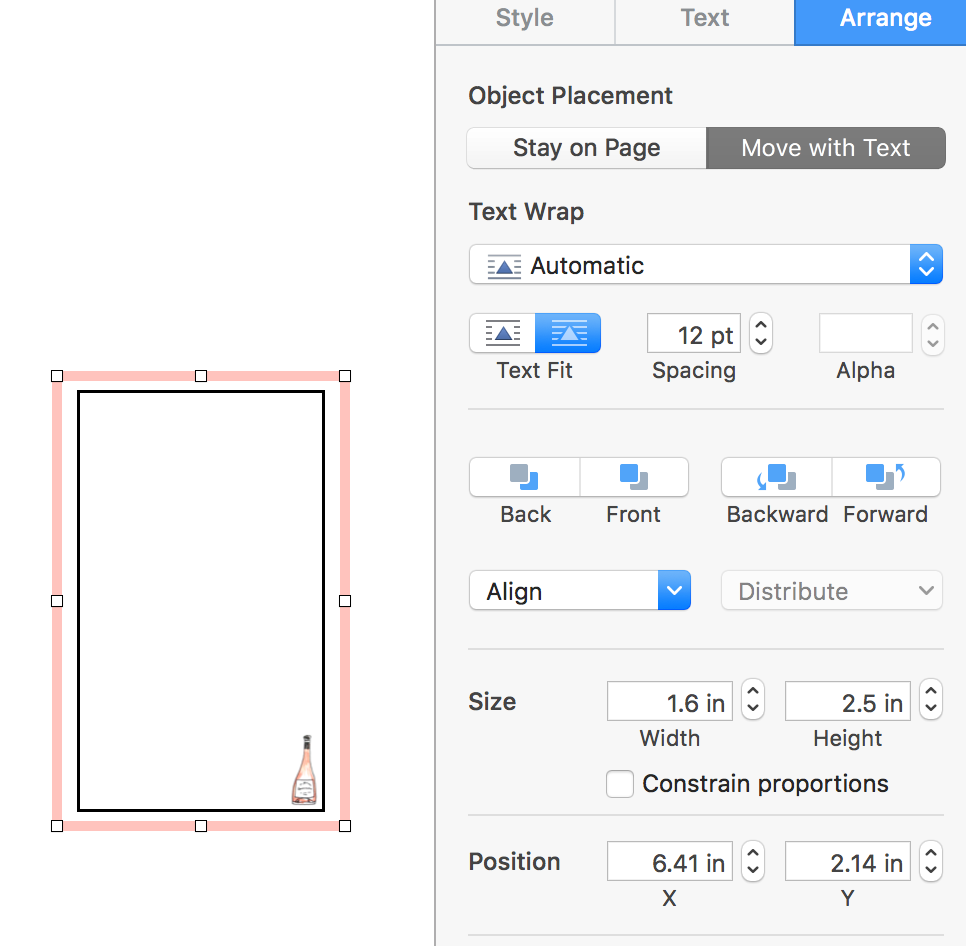
Like I mentioned before, I knew that I wanted a layout that would include plenty of fun and colorful organizational stickers, but I also wanted something that would leave me ample space to write. To give me that, I layered printed background pages underneath white boxes. The printed paper underneath shows me that I have time blocked off and the white block allows me space to specify what, when, and where I need to be. This is why I love using pages because it offers me a sidebar that helps me measure the exact measurements of the boxes and background prints. Pro Tip: Pages will try to auto-size your image if it is stretching or is too skinny. Uncheck "constraint proportions" to keep the program from re-sizing the image without your permission.

Pro Tip: The send to back button is your BFF and if you search what image you want and then add "PNG" at the end, Google Images will mostly bring up images with white backgrounds or no background at all! In this next picture I am making my daily blogging sticker. I make 7 of these and write down what blog post I will write that day on it. I usually make this a printed sticker that takes up 90 minutes of my day. I use a watercolor print as the background with a solid box around the picture to help me cut a straighter edge as well as make it clear how much time is "blocked out" on my daily schedule. I fade the background using the Opacity button on the style tab. I take the opacity anywhere from 35-40% depending on the color of the background image. By now, you can tell I'm working on a Rosé themed week (which I'm obsessed with). To make them look exactly the same, measure out one image and one box. Fix the opacity and color of each and then copy and paste however many more of them you need. I find that I rarely make just one of one particular sticker. I normally make a few of each. Copying and pasting will be faster and make everything look more uniform.

Next I am making a layered box. This is one of those that has a white space for writing and a printed outline. I like these for 5 hour work boxes and "to do" boxes. Once school starts, I will make boxes like these for class as well as some for work. I like to spice these up by leaving a cute little image in the bottom corner just an extra detail. When doing this, make sure that the outside boarder is the measurements of the box, make the white box inside a little smaller. You also don't always have to use patterns, I am layering two solid boxes on top of one another. Pro Tip : If you use pages, the software will help you center the two layers on top of one another.

Next, I am making "littles". Littles are small things like chores and such that you have to get done each day. They won't require your full attention, but you want to keep track of them so littles help you out. I make these the height of one line on the agenda and usually place it at the very bottom. I make these solid and usually place a little icon on the far left to indicate what task it is. So far, I have a TV for my shows, a laundry basket for laundry and the wash, and a shopping cart for groceries and Target runs. Pro Tip: For the icons, just search what you're looking for i.e. "shopping cart" and then add PNG at the end. Make sure to choose something that no background (the grey and white checks on Google Images). If you are using Pages, they all of these icons under shapes. There are tons of options for studying, chores, travel, and even family!

Extra stickers are always what I add at the end. There are a few special stickers I like to make just incase I end up needing a check list instead of a timed schedule, or if I have a ton of extra space because of a slow weekend (which happens almost never) I will make a double wide sticker for extra decor. Circles with no color full and a solid outline make great stickers for making a checklist. I will place the circle on top of a time in my agenda if I need to make a shopping list or a chore list instead. Making a double wide sticker is easy too, just double the width of the single column. I usually make this one quote or a watercolor artwork.

This is the finished product of the planner stickers. I really love the way this set turned out. I saw Rosé in the grocery store today and it completely inspired me to make a Rosé themed sticker set. These are great because they are cheaper than the Etsy packages and I can tailor them to my person life and schedule. Once school starts, I will make a sticker for chapter meetings, class times, library time, date functions, recruitment week (I'm most excited about) and holidays. If you would like to see plan with me posts every now and then let me know. Also let me know if you would be interested in purchasing these sticker packs. I can always add them with the Daily Dose of Prep Stickers. Load your sticker paper into your printer and just print these! Cut them out with scissors and get organizing! If you choose to make your own, I would love to see your pictures!!

Stay Preppy,
Lucy


Comments